• Skip to primary navigation
  • Skip to main content
  • Skip to footer

Houston's Premier Scuba and Dive Shop Oceanic Ventures Inc.

(713) 523-3483 (dive)
5808 Newcastle Drive
Houston, TX 77401

  • Home
  • Stay Current
    • Our Blog
    • Travel and Events Calendar
    • Club Aquarius Social Club
      • Club Aquarius Social Club Upcoming Events
      • Club Aquarius Social Club – The Past
    • Special Events
    • Local Scuba Diving Events
    • Photography Contest
    • Categorized Blog Posts
  • Equipment
    • Dive Equipment
    • Rebreather Systems
    • Cruise Ship Passengers
    • Repair & Maintenance
    • Air & Mixed Gas Blending
    • Pure Fiji Spa Products
  • Training
    • Become a Scuba Diver
    • Scuba In Your Home or Ours
    • Diving Programs for Young Explorers
    • Recreational Dive Courses
      • Recreational Dive Courses overview
      • The Briar Club Scuba Program
      • West University Scuba Program
      • Houstonian Scuba Program
    • Technical Diving Courses
      • Basics
      • Nitrox
      • Trimix
      • Rebreather
      • Wreck Diving Programs
      • Cave Programs
      • Blending
    • Leadership Dive Courses
  • Travel
    • Travel Escorted Adventures
    • Travel – Other Travel Programs
    • Travel – Custom Travel Adventures
    • Local Scuba Diving Events
    • Technical Travel
    • Scuba Diving Around Texas
    • Travel Insurance
    • Travel Forms
  • Company
    • About Oceanic Ventures
    • Meet Our Team
    • Testimonials
    • Facility Hours
    • Map
    • Oceanic Ventures Foundation
    • Resources & Articles
    • Archive
  • Shop
    • Online Store
    • Cart
    • Checkout
    • My Account
    • Policies regarding Privacy and Purchases
  • Contact

Archives for September 2017

September 28, 2017 by Eric Keibler

Equipment Special – Zeagle Trade-In Offer

TRADE IN ANY DIVE AIR DELIVERY SYSTEM, WORKING OR NOT, AND RECEIVE A DISCOUNT TOWARDS A ZEAGLE F8

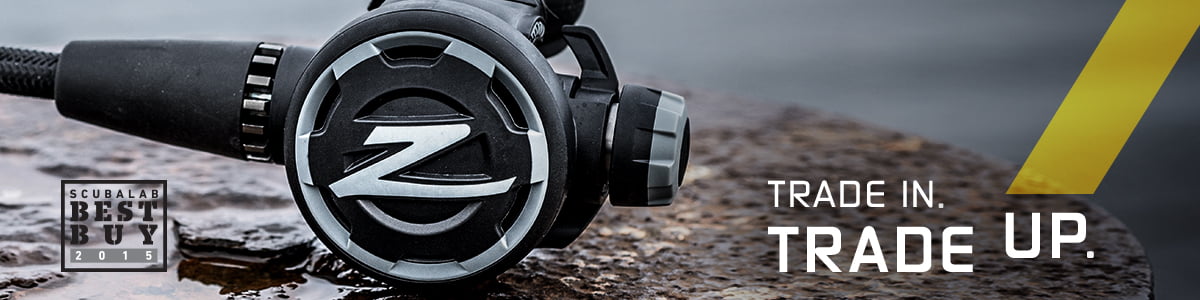
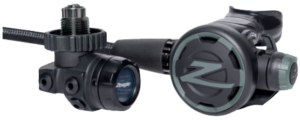
Huish Outdoors has extended their trade-in offer for people in the flood-ravaged part of the country until October 31.  So, bring in your used Air delivery system (first and second stage) to Oceanic Ventures, Inc. and you will receive over $100 toward a new F8 Regulator (Yoke or Din style).
The best performing diaphragm regulator on the market today. In partnership with Atomic Aquatics, we engineered over 20 different improvements on everything from inner mechanisms and materials to exterior controls and aesthetics. The F8 breathes better, works harder and lasts longer than any other air delivery system Zeagle has ever made.

Filed Under: Open Circuit, Scuba Diving Equipment Tagged With: Equipment, equipment specials

September 28, 2017 by Eric Keibler

Equipment Special For Photographers the SeaLife DC2000


The new DC 2000 has a waterproof  camera to 60 feet,that fits into a housing rated to 200 feet and shoots at 20 MP, Shoots RAW, JPG, 1080 HP video – Free Wide-angle lens
Free Wide Angle Lens: Urgent:  The program ends on Friday but, Dive Mom has an extension so that you can order before noon on Monday, Oct 2 2017, so you can get the Free Wide angle lens.
 
Upgrade Offer:  If you purchased a Sealife 2.0 Camera, from us in the last two years, and want to trade-it for the DC2000, you get a $150 credit toward the DC2000.  This is an Oceanic Ventures only promotion and expires on Monday October 2 at noon.  Please note, the camera must be in working order and traded in with the charger cord.

This is SeaLife’s most advanced camera! 

Enjoy full creative freedom with SeaLife’s new DC2000 digital underwater camera. Featuring a large SONY® 1″ type back-illuminated 20MP image sensor and RAW formatting capabilities, the DC2000 will let your underwater inspirations guide you to stunning results.
 

  • Full featured with nearly unlimited editing options
  • With an ultra-fast auto focus and shutter response, you’ll never miss a shot with the SeaLife DC2000.
  • Take control of your creativity by selecting from the 8 shooting modes: manual, aperture, underwater, shutter, program, intelligent auto, land, and panorama.
  • JPEG and RAW (Adobe .dng) imaging formats are available, providing you with nearly endless photo editing options. Get the best of both worlds.
  • With DSLR-like imaging results, you’ll want to make the DC2000’s waterproof inner camera your go-to land camera with the ability to capture rich landscapes and stunning close-ups and portraits.
  • The DC2000 features a 31mm (film equivalent) lens with a variety of underwater lens options available.
  • Ultra-fast shutter response of 0.1 seconds
  • 4 Underwater Shooting Modes for sharp, colorful underwater pictures under any conditions
  • 3 built-in underwater digital color correction filters: shallow water (snorkeling), deep water (diving) or “green” water (algae bloom)
  • 25 Land Scene modes adjust camera settings for specific shooting environments
  • Intelligent Auto Mode selects the optimal land scene mode for effortless shooting
  • Continuous Burst Shooting shoots high resolution 20MP pictures up to 10 frames per second
  • Manual White Balance control to customize UW color correction to your specific depth and water conditions
  • Manual shutter and aperture for complete control over image exposure from 15 to 1/2000 seconds and F1.8 to F11 in 0.3 stop increments
  • Auto focus from 4″(10cm) to infinity
  • WiFi to wirelessly preview, download and share pictures/videos to smart phone or tablet with free Link123 Plus app. Includes Geotagging and “Auto Send” functionality.
  • Micro SD, SDHC SDXC and UHS-1 memory card compatible up to 64GB
  • Optical Image Stabilization (OIS) – CCD shift technology reduces camera shake
  • Short-cut key for fast and easy access to favorite menu setting
  • Expandable with Sea Dragon Flash(es), Photo-Video Lights and SeaLife lenses
  • Rubber armored, shock-resistant for rough handling and tough environments
  • Depth rated down to 200ft/60m (camera in housing)
  • Depth rated down to 60ft/18m (inner camera)

Filed Under: Digital, Photography, Underwater Tagged With: equipment specials, photography, underwater photography

September 25, 2017 by Eric Keibler

Recovering Your Breathing Air Compressor After A Flood or Water Damage

Jess Stark in Truk LAgoon
Jess Stark in Truk Lagoon
With so many of our friends in the Caribbean having suffered damage from the recent hurricanes, I  asked one of our clients, Jess Stark, President of Stark Industries,  what someone could do to recover from water getting on or submerging their compressor.  In true Jess fashion he laughed and said “well they could hire me to do it.”  But, then getting serious he sat down and described the process to me and developed a plan of attack to bring the compressor back on-line.  Jess said the important part is to act quickly but reasonably and approach the task methodically.  Here are the steps from Jess.

What You Will Need

Stark Industries Compressor Oil
To start the salvage operation you will need the following:

  • Tools, including a set of wrenches and sockets
  • Fresh water
  • WD40, about a gallon (you can use diesel but it does not work as well)
  • Hair dryer
  • Emery Cloth, 400x
  • Anti-seize lubricant,
  • Compressor oil

Steps to Salvage You Compressor

  1. Turn off the power to the unit. Flush the entire compressor with fresh water, this is important and must be done as soon as possible to remove any salt water or other contaminants.  This includes the motor, both inside and out.
  2. Motor – the bearings in the motor are likely sealed (cool) but you need to dry everything out after the rinse. Use the hair dryer for this job slowly turning the motor shaft.  Keep turning it until every thing is dry.
  3. TEFC Frame motor
    TEFC Frame motor
    If you were lucky enough to have a TEFC Frame motor, totally enclosed, fan cooled motor, you probably won’t have to dry the internals out unless it stayed submerged for a long time. You can confirm that it stayed dry by opening one end cover and checking that it is dry.
  4. Drain the compressor crankcase completely, tilt the compressor to make sure everything is coming out.
  5. Flush the crank case with fresh water and use your hair dryer to dry it out completely.
  6. Remove all of the cylinder heads and valves. Dry with the hair dryer to remove any water.
  7. Place the valves in a coffee can or bucket and cover with WD-40. If you cannot find WD-40, you can use diesel but WD-40 was designed to remove or displace water so it is the better choice.
  8. Dry out any water in the cylinders then pour oil in and rotate the compressor shaft while ensuring the oil covers the cylinder walls completely. (any rust stains found at this point should not have started a “pitting action” on the cylinder walls and therefore should be harmless).  If you have cylinders point down, you will need to turn the compressor upside-down to do this step.
  9. Flush the electrical boxes and power terminals with fresh water if they were submerged or got wet during the storm. Use the hair dryer to dry everything out.
  10. AP-120 Purification System
    AP-120 Purification System
    Your purification system should be alright since it is sealed. But, make sure to rinse the exterior of the towers and components with fresh water.  However, the top of the back pressure valve is open (i.e. exposed) and, must be rinsed and dried.
  11. Rinse and dry the intake filter element.
  12. Disassemble and inspect the valves for carbon deposits and look at the seating surfaces. Lap the seating surfaces with the emery on a glass plate if needed.
  13. Reassemble everything. Make sure to use the anti-seize lubricant on the bolt threads.
  14. Refill the crankcase with fresh lubricant and rotate the compressor by hand to make sure it turns and feels smooth
  15. Replace the belts if necessary and restore power to your unit
  16. Now comes the test—turn it on.
  17. When you start pumping air, make sure the fill hoses are not full of water. If water comes out, you will need to flush the hoses and the air distribution manifold with fresh water and then use the compressor to dry them out.
  18. If you are using pneumatic fill whip ends, you will want to disassemble them, dry and re-lubricate them (now is a good time to replace the O-rings).
  19. After you get it running, we recommend you get your air tested to make sure everything is operating properly.
Jess Stark at Work
Jess At Work
If you need more advice or have questions, please contact Jess.  He is here to help!

Who is Stark Industries?

Stark Industries
Stark Industries was founded in 1962 as a machine shop in Houston, Texas by Jess Stark. As the business grew, Jess steered Stark Industries into manufacturing specialized high pressure compressor packages in 1969.
Today, Stark Industries resides on 1¼ acres in Houston prime. Our shop technicians and operators design and craft everything on site.  Our philosophy is to keep it simple. Our goal is to build a dependable, bullet-proof machine, that is easy to operate and maintain.
We build, rebuild and refurbish breathing air compressor systems as well as other large industrial compressor systems.


Filed Under: Scuba Diving Equipment Tagged With: Equipment, Hurricane

September 4, 2017 by Eric Keibler

Cleaning and Decontaminating Flood Soaked Scuba Diving Equipment

With all of the rain and flooding in Houston from Hurricane Harvey this week I am sure that some of your scuba diving equipment was exposed to the rising flood waters inundating the area.  I’d like to tell you how to clean and decontaminate flood soaked diving equipment.  I bet your thinking, “But it is scuba equipment, its supposed to get wet, right?!  It is just fresh rain water, right?”
While the initial rainfall may have been fresh water, the water that inundated many Houstonian’s homes was not. The water didn’t enter homes directly. Instead, it landed on the ground and made its way into the home by moving through storm sewers, run-off channels, bayous, etc.  During this journey it may have picked up any number of contaminates.  The flood water may contain dirt, animal waste, sewage, industrial chemicals, pesticides, home cleaning chemicals (especially with water in the home), oil, fuel, bacteria and viruses.
While much of your scuba equipment is designed to operate in a wet environment, it was not intended to be submerged in the rising waters of the Bayous. This type of water presents a different set of issues that are not normal to diving equipment – namely, immersion in unsafe contaminates.

The Fundamentals of Decontamination

According to the US Navy Manual, Guidance For Diving In Contaminated Waters, “the aim of decontamination is to either rapidly and effectively render contamination harmless or remove it. The goal of systematic decontamination procedures is to limit the spread of the contamination and reduce the levels to the greatest extent possible in order to protect personnel and equipment.”
According to the Environmental Protection Agency, there are a number of solutions that can be used to decontaminate equipment after exposure to contaminated water, see table 1.
TABLE 1: EPA Environmental Response Team – Decontamination Solution Effectiveness/Safety

Decontamination Solution Use against Biological Contaminants Use against Chemical Contaminants Safety for Diver Skin Contact Dive Gear Compatibility
Potable Water C C 1 1
Antimicrobial Soap A A 1 1
Bleach A B 2 2
Betadine A C 2 2
Simple Green B B 1 1
Quaternary Ammonium A B 3 2
TSP B A 3 3
Alcohol A C 3 2

Effectiveness:                         A = Very Effective   B= Effective   C= Somewhat Effective
Safety/Compatibility:             1= Not harmful   2 = Potentially Harmful   3 = Harmful if other precautions not followed
In talking with Nancy Burger, President of Modern Chemical, Inc., manufacturers of Blue Gold Cleaning Solutions, Blue Gold is an ideal cleaner for equipment that has been submerged in contaminated water because it is highly concentrated, environmental friendly and non-toxic.  They have a number of clients using it to clean neoprene and rubber products (including Florida Power and Light) and they have reported that there is no degradation of the materials with repeated use.  Blue Gold is an industrial grade cleaner that is safer for the environment than many other products and was tested by the Compressed Gas Association and endorsed for its cleaning efficiency and compatibility and has been tested by NASA and others.  Additionally, it is used as a de-greasing and cleaning agent in the diving industry for cleaning equipment for oxygen service.  It is the recommended product for this purpose by Atomic Aquatics, Aqua-Lung, Oceanic Products, Hollis, and Zeagle Products.
According to the Iowa State University Center for Food Security and Public Health, “in addition to chemical disinfectants, heat, light and radiation may also be appropriately used to reduce or eliminate microorganisms in the environment. The use of heat is a one of the oldest physical controls against microorganisms and is fairly reliable method of sterilization . . . Although both moist heat (autoclave, steam) and dry heat (flame, baking) can be used for inactivating microorganisms, moist heat is more effective and requires less time than dry heat. Sunlight and ultraviolet (UV) light can have a detrimental effect on a number of microorganisms and may be a practical method for inactivating viruses, mycoplasma, bacteria and fungi, particularly those that are airborne. UV light sterilizing capabilities are limited on surfaces because of its lack of penetrating power. Other forms of radiation are less frequently used but may include the use of microwaves or gamma radiation. Freezing is not a reliable method of sterilization but may help to reduce heavy numbers of bacteria; some microorganisms are resistant to freezing”.  Unfortunately, most diving equipment is not heat tolerant and does not do well with long UV exposure.  However, this research does indicate the some exposure to sunlight may help in the disinfection of the equipment.
 

Decontaminating Your Scuba Equipment

Protective Gloves
The US Navy uses a combination of products and procedures to decontaminate their personnel and equipment after diving in contaminated water.  Using a modified version of these protocols should be sufficient to decontaminate diving equipment that has been submerged in flood waters.
If you find that your scuba equipment has been submerged in the recent flood waters, it’s best to assume that the water is contaminated.  So, after donning your protective clothing (i.e. long pants, boots, gloves and eye protection) Let’s find out what can be salvaged.
First, remove all of the equipment from your equipment bags. Dispose of any batteries, paper products, cleaning products, defog, mask cleaners silicone spray etc.  These liquid products are probably contaminated, and therefore ineffective. So, out they go.
Now line up the remaining items, including the bags, and rinse everything with fresh water and using a stiff brush, clean off any dirt or debris.  Use a nozzle on the hose to get more “cleaning action.” (You can also use a pressure washer on a low setting).  At this point, things should be looking up.
After your rinse is completed, let’s focus on removing any chemicals that might be in your equipment.

  • Blue Gold Scuba Cleaner
    General Cleaner and De-greasing agent
    Option 1 Blue Gold Cleaner:  In a clean trash can, prepare a Blue Gold Cleaner solution (using a 1:20 ratio) and use it to clean your equipment (Blue Gold is an all purpose cleaner which can be used to remove oil, dirt , grease, chemicals, etc.  It is used an a cleaner for neoprene and rubber products as well as for cleaning all metals including air delivery systems for yuse in high oxygen environments.  http://www.bluegoldcleaner.com/.) As you can see, it is very concentrated and is safe for the environment.  You should use a dunking action to create some agitation in the solution to help remove impregnated chemicals on the equipment.  Let everything soak for about 30 minutes.  Remove the non-cloth items and let the other items soak for another 30 minutes.  Then, it is time to rinse out all of the cleaner/soap.  You can use your hose again, and then I would suggest using the trash can with fresh water to help as well. (Don’t worry, Blue Gold is non-toxic, biodegradable and safe for the environment).  If you need some, come by Oceanic Ventures; we have it in the repair department.
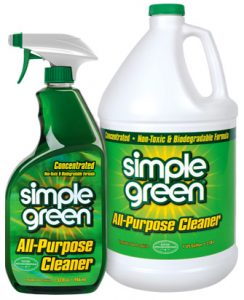
  • Option 2 Simple Green Cleaner: In a clean trash can, prepare a Simple Green Cleaner solution (using a 1:10 ratio) and use it to clean your equipment (Simple Green All-Purpose Cleaner can be used on any washable surface, from floors and walls to laundry stains. It removes the toughest stains including dirt, grease, oil, pet stains, coffee and juice stains, lipstick, blood, adhesives and much more. http://simplegreen.com/products/all-purpose-cleaner/.) You should use a dunking action to create some agitation in the solution to help remove impregnated chemicals on the equipment.  Let everything soak for about 30 minutes.  Remove the non-cloth items and let the other items soak for another 30 minutes.  Then, it is time to rinse out all of the cleaner/soap.  You can use your hose again, and then I would suggest using the trash can with fresh water to help as well. (Don’t worry, Simple Green is non-toxic and is biodegradable).

For our next step we are going to focus on the other contaminants that might still be present in your diving equipment.  So, using the same clean and thoroughly rinsed trash can, prepare a disinfecting solution.  Two choices might are:

  • Bleach Solution: dilute common household bleach with water (1 ¼ cup bleach to 1 gallon of water). (Remember, chlorine bleach can damage silicone and rubber products and is hard on the environment).
  • Steramine Solution: Dissolve 2 tablets to a gallon of water (it turns a nice shade of blue).
Steramine Sanitizing Tablets
My personal recommendation is the Steramine Solution.  It is a Quaternary Ammonium, Quats, solution, but unlike other Quats, it is safe for skin in its tablet form and when it is mixed with water.  This is the same solution used by rebreather divers for disinfecting the breathing lungs, and it is used to sterilize kitchen equipment and food preparation surfaces in bars and restaurants.  Child care facilities are also using Steramine to disinfect toys and surfaces.  It is less damaging to silicone and rubber than bleach.
Starting with your non-fabric items, soak them in the solution for about thirty minutes.  Remove them and set them aside. Now it’s time to move on to your fabric items.  Let them soak for about thirty minutes.  If you used a bleach solution, rinse the products off thoroughly.  After you have finished this disinfecting stage, set everything in the sun to dry.  In Houston, it probably won’t dry completely, so you may have to move it inside a clean area of your house (remember you don’t want to re-infect it) and finish it the next day.
After you have cleaned it, you may find some rubber products remain “sticky.”  This is especially true with some latex products.  This generally indicates that the materials have begun to break down.  If this is the case, this item will need to be replaced and you should discard the item.  Unfortunately, not everything can be saved.

After Cleaning and Decontaminating Your Scuba Equipment

Now, it is time to have your air delivery system and buoyancy control device serviced by a qualified service center.  It is your turn to finish maintaining your other equipment…

  • Mask straps, skirts, fins, snorkel, plastic retainers, etc. – treat them with food grade silicone spray (the kind your local dive shop sells). It is important to re-coat all of your silicone and plastic because the disinfection procedure dries out the materials and can cause them to wear out faster.
  • Zipper Cleaner & Lubricant
    Bags – Use McNett “Zip Care” to clean and lubricate all of the zippers; be sure to “work” the zippers back and forth to distribute the lubricant throughout the zipper.
  • Lights – Check the O-rings. Clean them of dirt and debris with a soft lint-free cloth, and lightly lubricate all them with silicone grease. Clean the electrical contacts with contact cleaner, which will remove any corrosion that may have developed.
  • Dive Knives – Coat the blade with silicone (the same spray above).
  • Clips and Hardware – Lubricate them with silicone spray making sure to “work” the gates and slides.

After you get your equipment back from the service center, call Dive Mom or your local Dive Facility and book a trip; you need to relax and de-stress after all that cleaning!

Filed Under: Scuba Diving Equipment, Uncategorized Tagged With: cleaning, Equipment, Hurricane

Footer

Contact Us

Oceanic Ventures, Inc
5808 Newcastle Dr.
Houston, TX 77401-3214
USA

Phone: 713-523-DIVE (3483)

eMail: divesafe@oceanicventures.net

Signup for our dive and scuba newsletters

Don’t miss news about the exciting happenings at Oceanic Ventures.


Map and Directions

Socialize

  • Email
  • Facebook

Why People Choose Us

People choose their friends carefully just as they should choose their adventure partners and Scuba Diving Instructors.  Oceanic Ventures is the premier scuba dive shop in Houston, Texas, and the Southwest because of our exceptional service and our sense of adventure.  In talking with our clients and friends, people choose us for a number of reasons such as: Passion – We love what we do and we want to share the beauty and excitement of the underwater world with everyone we meet. Caring- Our clients tell us they love us because we truly care about people and strive to make their scuba diving experiences safe, fun and enjoyable. Professional – Our staff members are the … [Read more …]

Copyright © 2026 all rights reserved Oceanic Ventures, Inc. · Sitemap · Log in